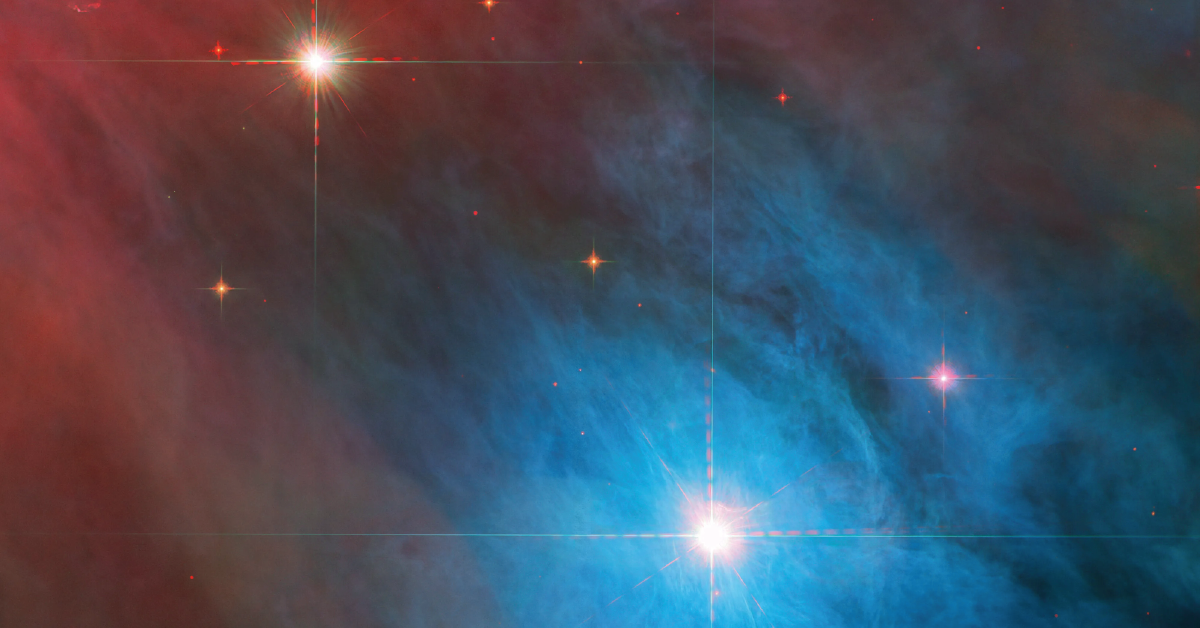
On a clear night, you can look up and see thousands of stars with the naked eye. But beyond that visible layer, deep in the quiet dark, are objects so faint they’re invisible without help – glowing clouds of gas, ancient galaxies, star clusters hanging in the void. Capturing those hidden sights is what deep sky astrophotography is all about.
And the best part? You don’t need to be an expert to begin. With a modest setup, a bit of patience, and a clear view of the sky, you can start photographing the deep universe from your own back garden or local dark sky site.
Here’s a guide to getting started – written for beginners, explained without jargon, and built on real-world tools you can grow into.
Understand What You’re Photographing
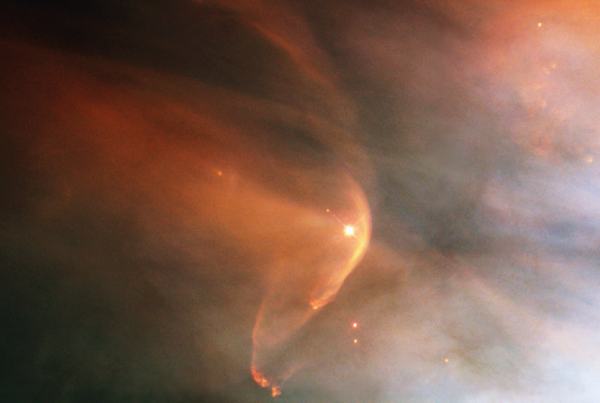
Deep sky objects (often called DSOs) include things like nebulae, galaxies, and star clusters. These are usually too faint to see clearly through binoculars or a telescope alone – but with long-exposure photography, they become visible and colourful.
Some well-known beginner targets include:
- The Orion Nebula (M42)
- The Andromeda Galaxy (M31)
- The Pleiades Star Cluster (M45)
You’ll need to know when and where to find these in the night sky. Free tools like Stellarium (desktop and mobile app) or Sky Guide can help you plan your sessions.
Start With the Right Camera and Lens
You don’t need a specialised astronomy camera to begin. Many people start with a DSLR or mirrorless camera – ideally one that can shoot in manual mode and handle long exposures. Brands like Canon, Nikon, or Sony are commonly used, and second-hand models can work well.
Pair that with a fast lens – something like a 50mm f/1.8 or a 135mm f/2.8. These “prime” lenses (ones that don’t zoom) offer sharp results and can gather lots of light.
Keep the Camera Still – or Let It Track the Stars
For basic wide-field shots (like the Milky Way or starfields), a sturdy tripod is enough. But for deep sky targets, you’ll need to keep your camera trained on the same point in the sky as the Earth rotates.
That’s where a star tracker comes in.
A star tracker is a small motorised mount that moves in sync with the rotation of the Earth. This allows your camera to take long exposures without the stars turning into streaks.
Popular beginner-friendly models include the Sky-Watcher Star Adventurer, the iOptron SkyGuider Pro, and the Move Shoot Move tracker.
Add a Telescope – When You’re Ready
You don’t need a telescope to start. But once you’re comfortable using a tracker and want to zoom in on fainter or smaller objects, a refractor telescope is a natural next step.
For beginners, look for something compact and lightweight – a 60mm to 80mm apochromatic refractor is ideal. These offer sharp, colour-accurate images and pair well with crop-sensor cameras.
To mount your camera to the telescope, you’ll also need a T-ring adapter and a field flattener to reduce edge distortion.
Capture Your Light – and Lots of It
Deep sky photography isn’t about one perfect shot – it’s about stacking many exposures together. Aim to take 30 seconds to 3 minutes per exposure, depending on your tracker and focal length.
During a single night, you might collect 50, 100, or even more exposures of the same object. These are called light frames.
To improve your final image, you can also take:
- Dark frames – to cancel out camera noise.
- Flat frames – to correct for dust or vignetting.
- Bias frames – to deal with read noise.
These might sound technical, but many stacking programs help automate the process.
Stack and Process Your Images
Once you’ve gathered your data, it’s time to stack it. This combines all your exposures to reduce noise and reveal detail.
A common free program for beginners is DeepSkyStacker, which aligns and merges your frames into a single, cleaner image. From there, you can edit the result using software like Adobe Photoshop, Affinity Photo, or free options like GIMP.
This step involves adjusting brightness, contrast, and colour – pulling your image out of the grey and into something vivid and dimensional. Think of it as developing film in the digital age.
Upgrade Gradually
There’s no rush to upgrade everything at once. As you grow, you might consider:
- A dedicated astro camera (cooled for long exposures).
- Narrowband filters to highlight specific wavelengths, like hydrogen-alpha.
- Auto-guiding systems for longer, more accurate tracking.
- A portable power supply if you’re imaging in the field.
But none of these are required for your first successful image. Many stunning deep sky photos have been taken with just a camera, a lens, and a tracker.
Choose Your Nights – and Be Patient
Weather plays a big role. Use forecasts like Clear Outside or Met Office cloud cover maps. Moonlight can also wash out faint targets, so aim for moonless nights or choose brighter objects during fuller phases.
Light pollution is a challenge in most of the UK, but it’s not a deal-breaker. Use light pollution filters or travel to a Dark Sky Discovery Site when you can.
And most importantly – be patient. Some nights will be cloudy. Some images won’t come out. That’s part of the rhythm of the sky. Each session teaches you something.
Final Thoughts: A Quiet Way to Connect with the Universe
Deep sky astrophotography isn’t about instant results. It’s about slowing down, paying attention, and learning to see what’s hidden in the dark. Over time, you’ll build the skills – and the images – that reveal the vast, glowing structures far beyond what the eye can see.
From your first tracked shot of Orion to your first processed galaxy, this is a hobby that rewards the curious. The sky is waiting – all you need to do is look up, and begin.